What do you do when you get your hands on a worn out leather sofa, and have been dreaming of making a leather day bed? You salvage the leather and get making!
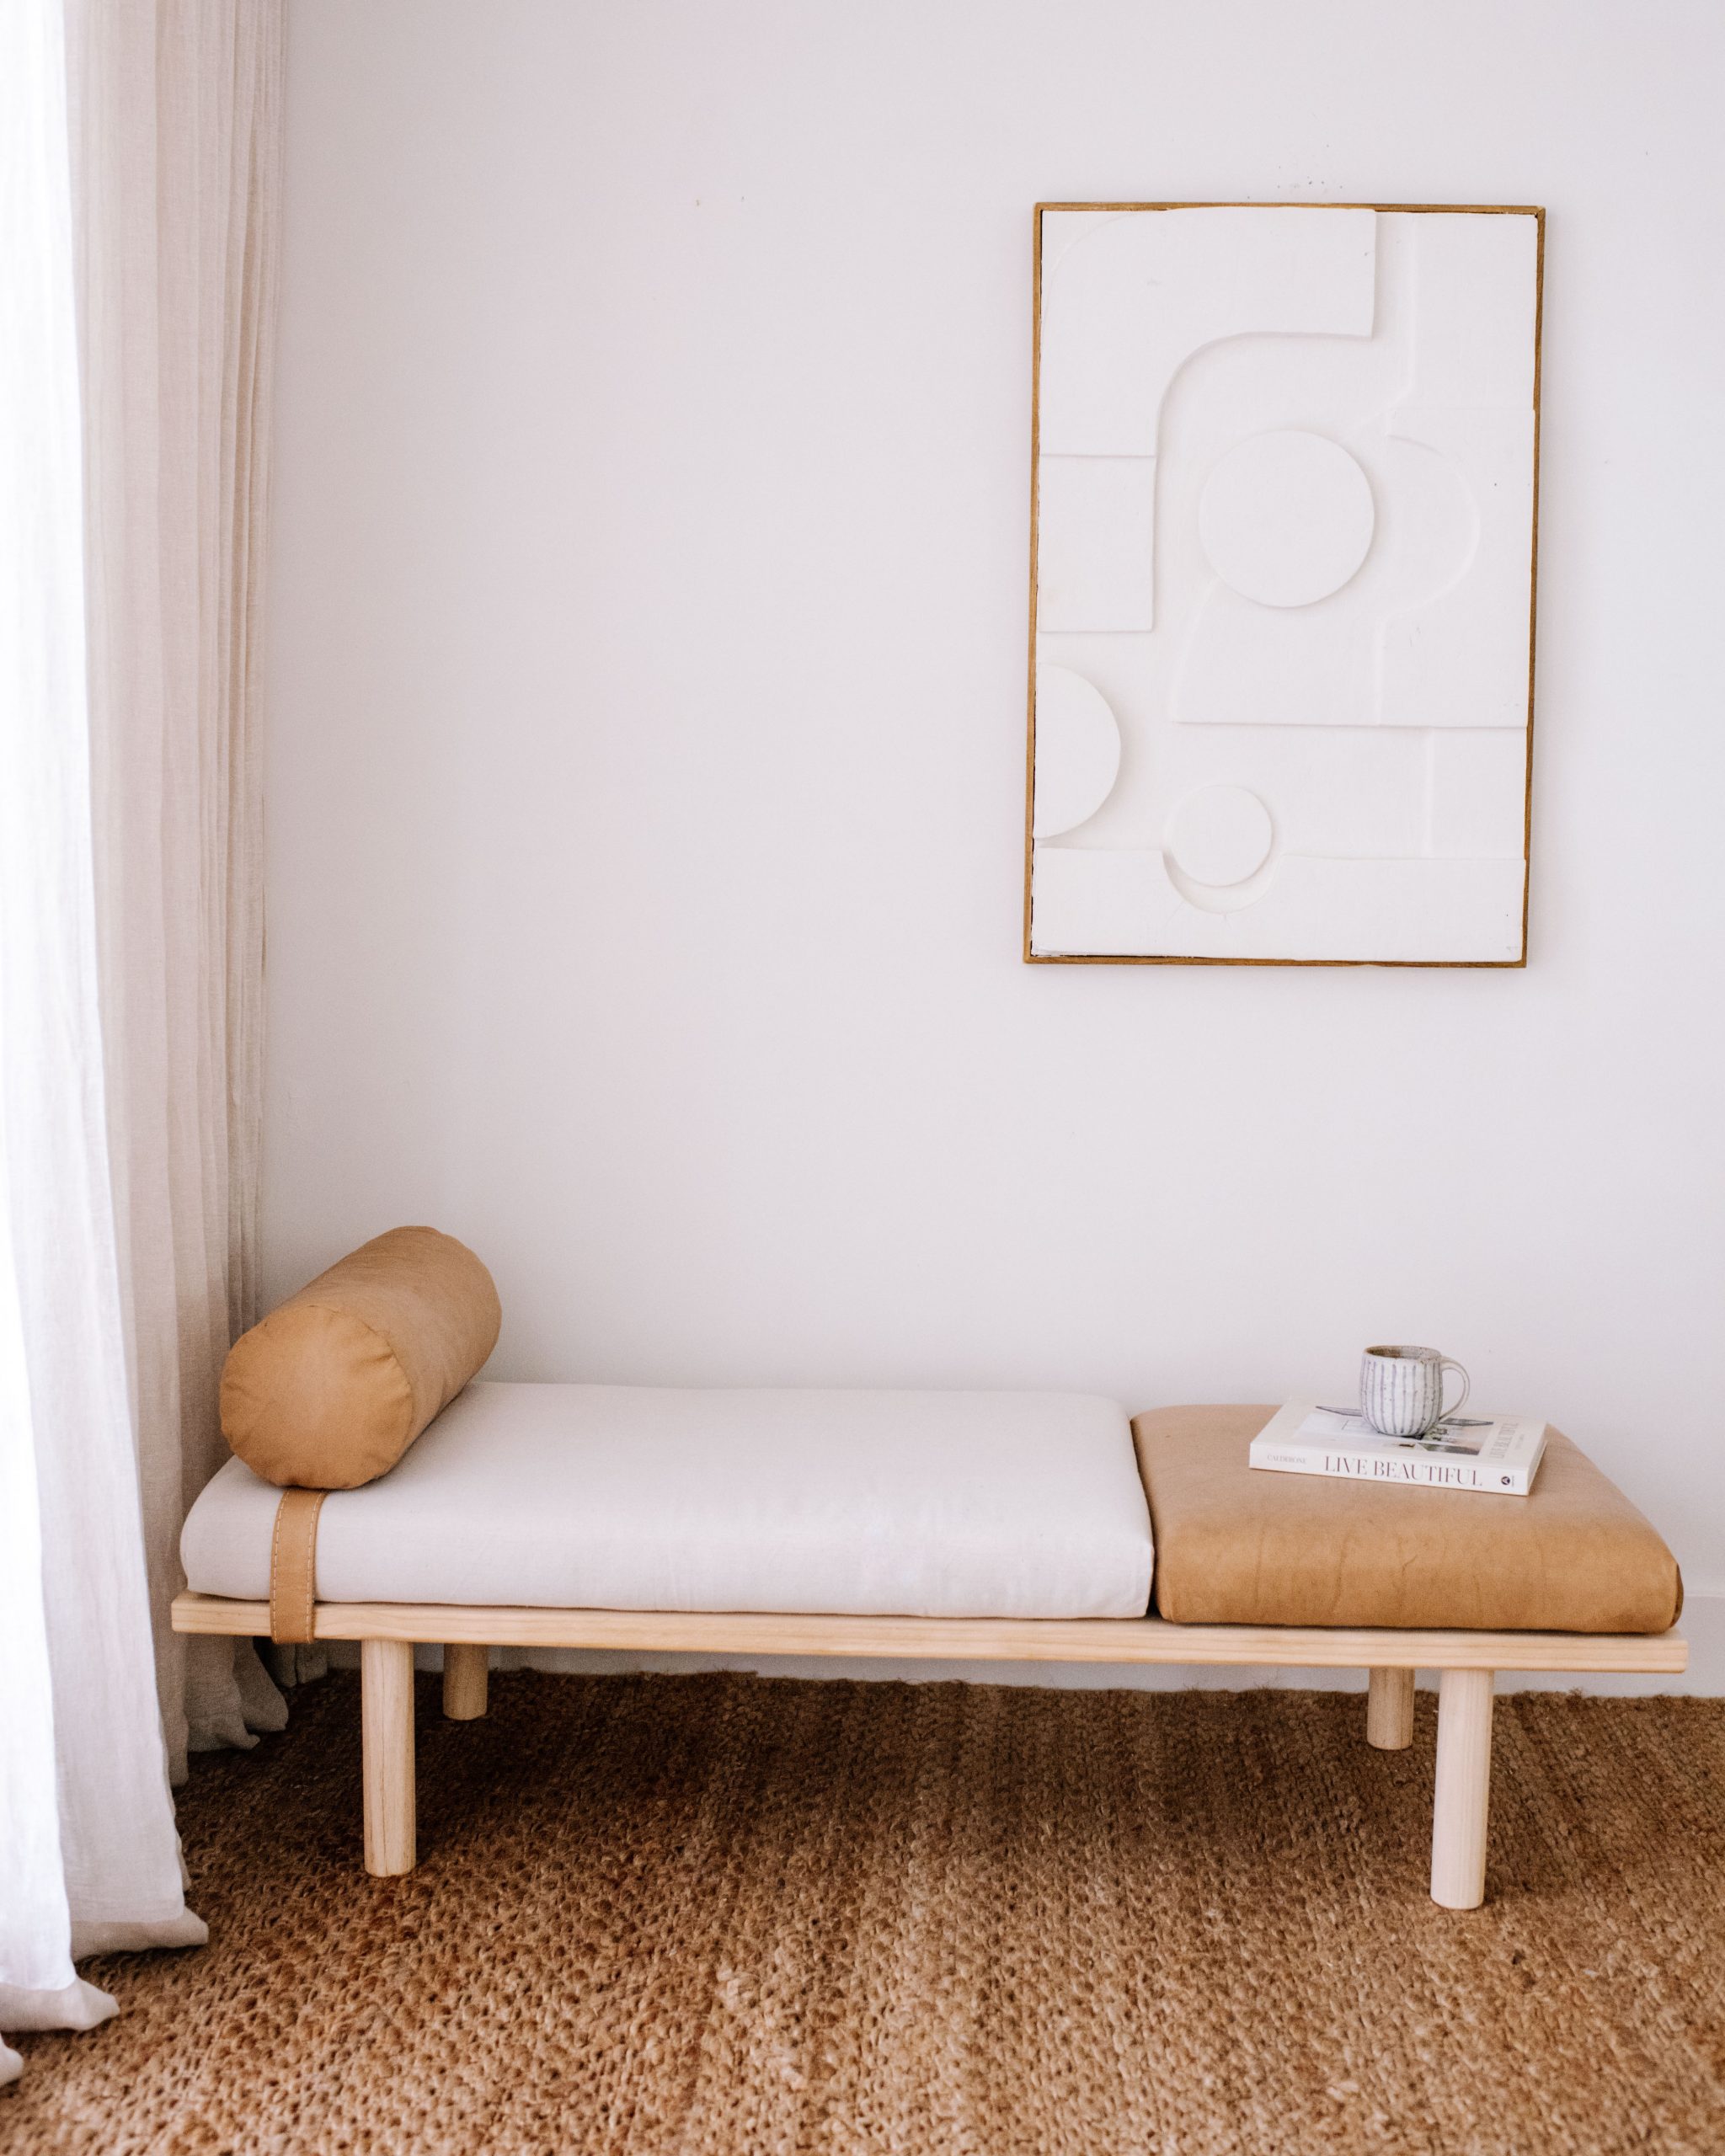
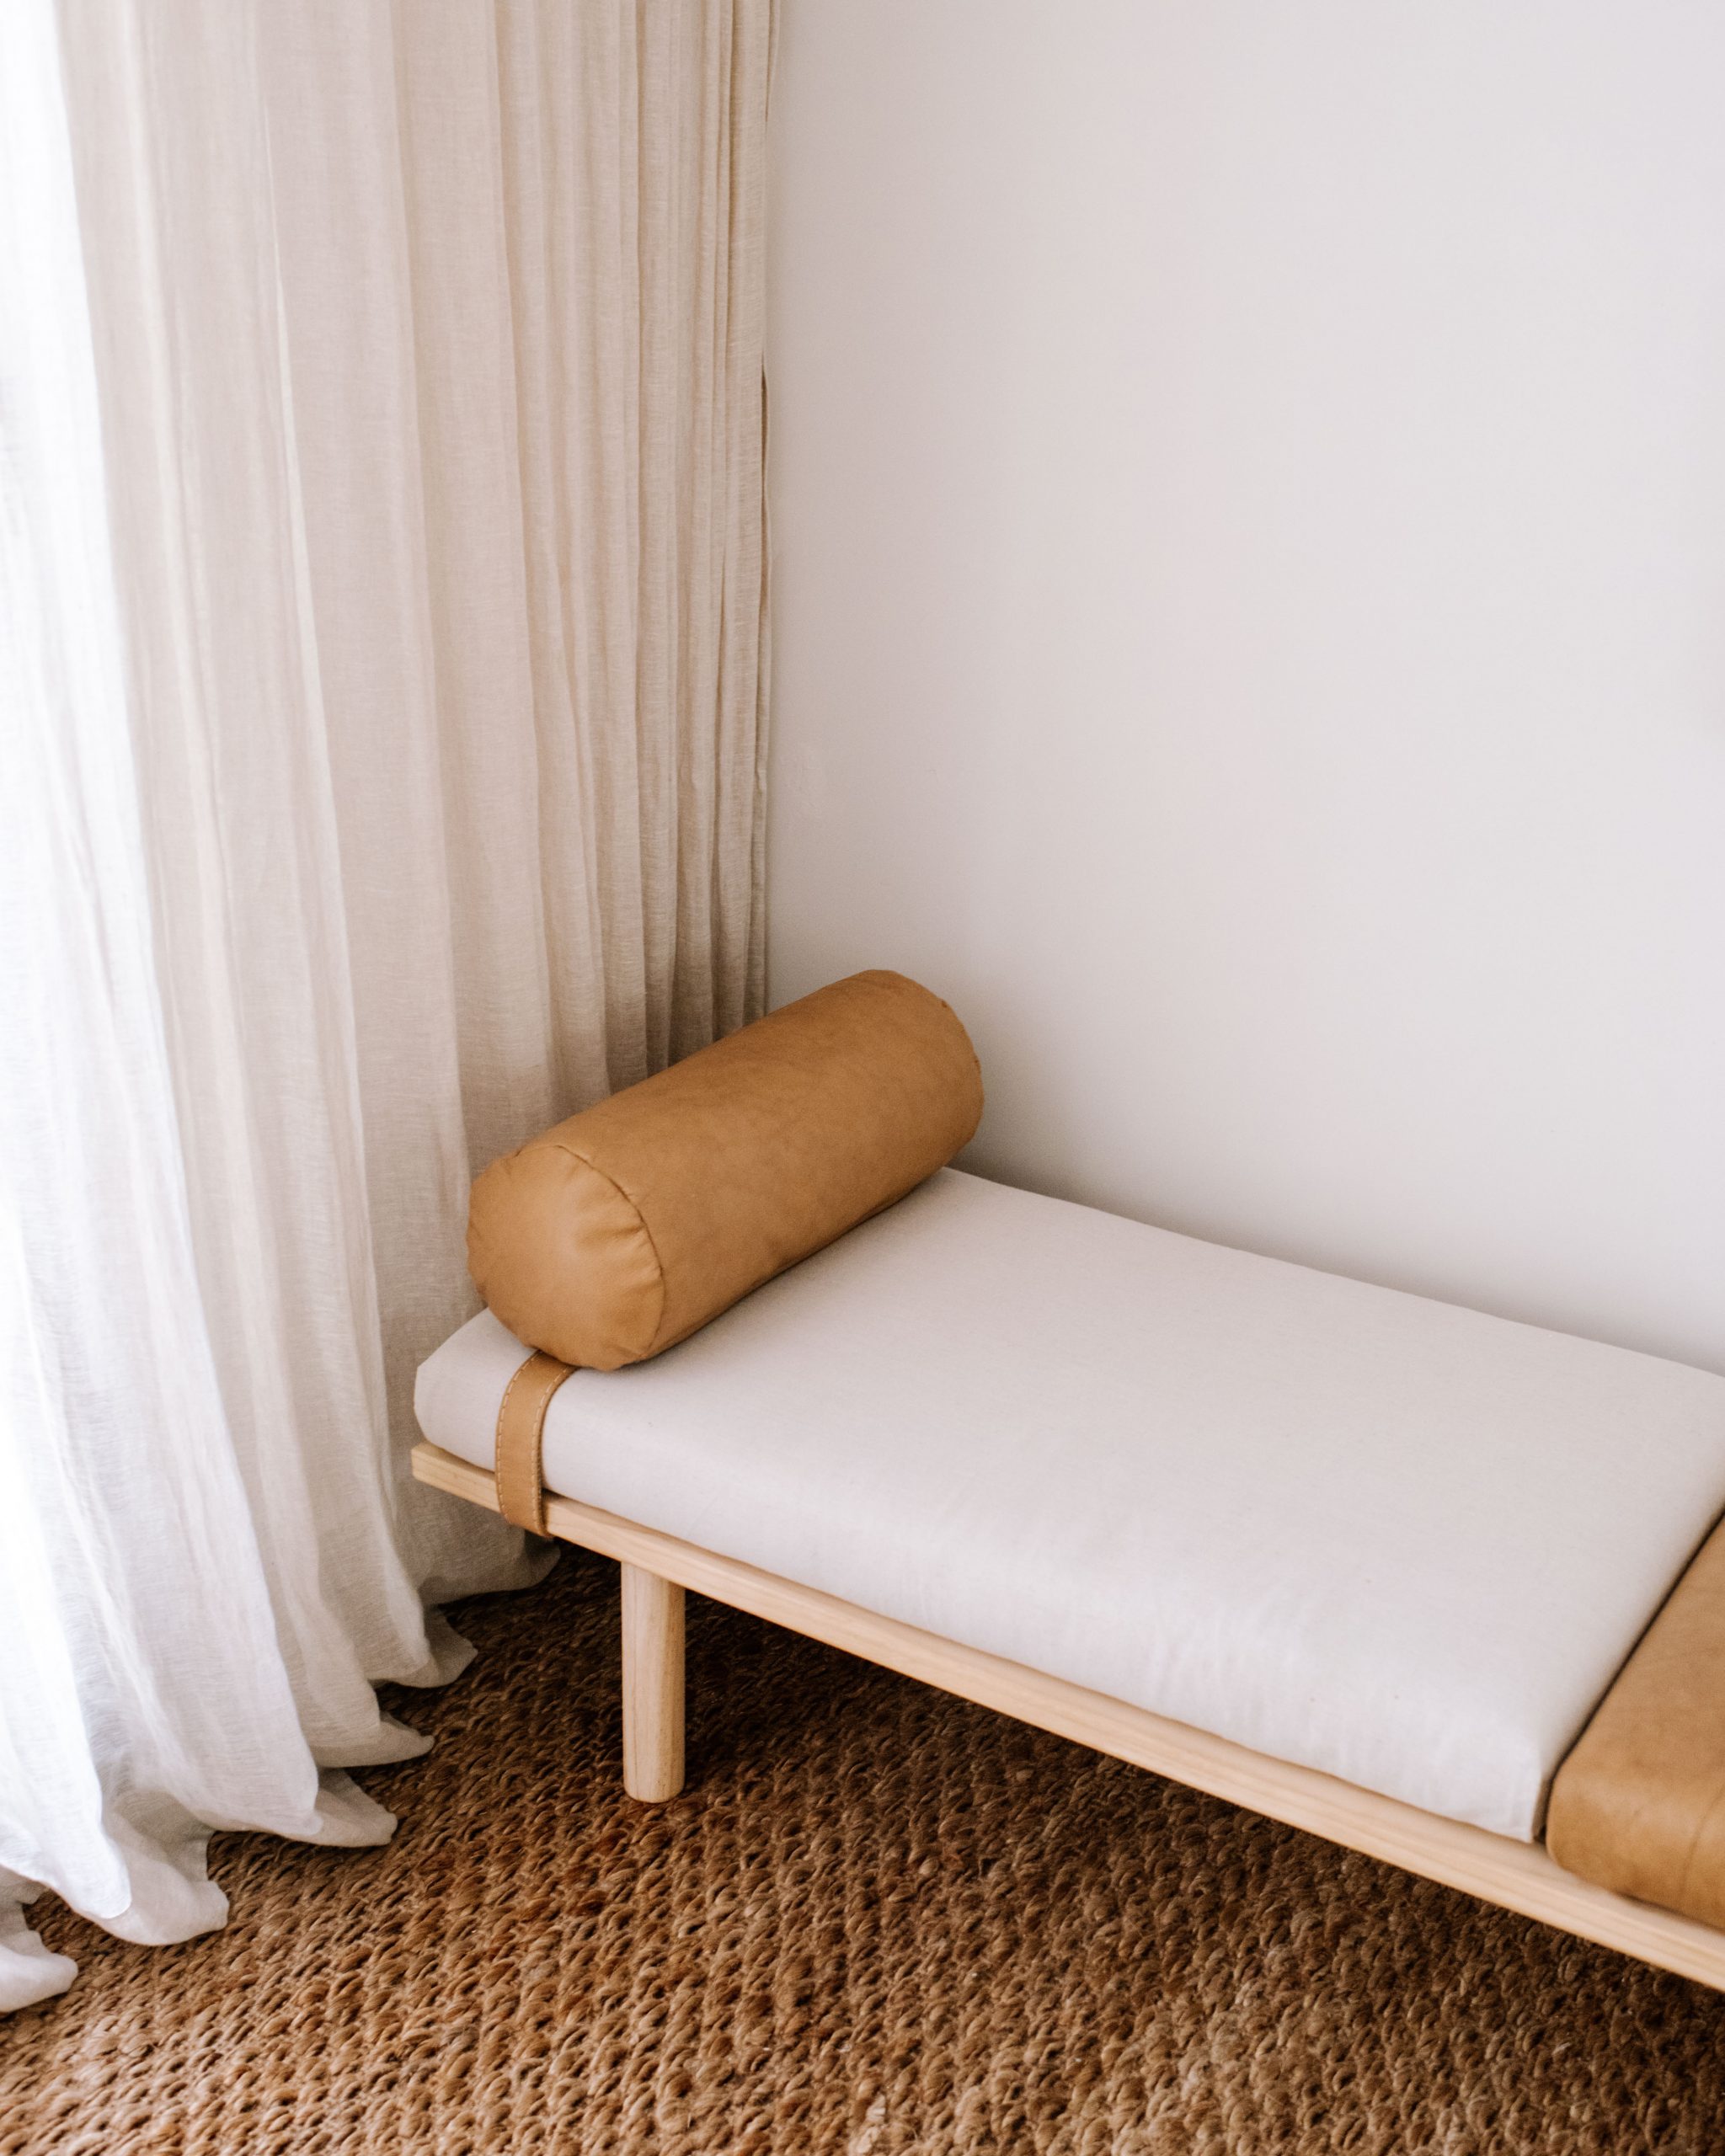
I’d been wanting to make a cute daybed for my studio for a while, and realised that with some salvaged leather this could be the perfect project. I ended up salvaging as much of the leather as I could, to use as the material for my final #FoundThenFlipped project. Using a piece of wood and screw-in furniture legs from Bunnings I was able to create this little daybed for my studio, complete with leather cushion and DIY leather bolster. Read on to see how.
Materials You’ll Need to make an upcycled daybed:
- A piece of timber
- Recycled leather
- Drop sheet (or other material)
- Stanley Knife
- Scissors
- Measuring Tape
- Staple Gun + Staples
- Batting
- Foam
- MDF board
- Spray Adhesive
- Screw-in furniture legs x 4
- Furniture leg plate x 4
How To make this Upcycled Leather Day Bed:
1
The first thing I did was strip the sofa of leather. I used my Stanley knife to slowly cut away all the seams, trying not to damage any of the leather that was in good condition.
2
Once I had the pieces cut off, I organised them into what sections I would use for what parts of the daybed. Initially I wanted to do strips cut up and then sewn back together but I realised I didn't have enough pieces wide enough, so in the end I decided to go with a larger section of leather along with some canvas. I needed enough to cover the 57cm x 49cm foam cushion for the end for the day bed and the bolster cushion.
3
For the foam for the cushions, I used a bit of a hodge dodge of foam I had to create the right size foam. I used spray adhesive to connect the foam pieces. I ended up with two pieces of foam. One was 57cm x 49cm and the other was 57cm x 95cm.
4
Once I had the foam cut, I measured and cut the leather, drop cloth fabric and the batting.
5
Once I had the fabric measured and cut, I cut out a piece of MDF board to go on the bottom of each foam cushion which I will use to staple the fabric into to give the piece a nice clean upholstered look.
6
From there I began upholstering the fabric and batting onto the foam cushions by folding over the fabric all together, holding firmly and stapling into place.
7
Now to create the structure! The piece of wood I used was originally quite large so I cut it down to 165cm x 58cm. This is on the smaller side but I wanted it to fit in my office, but you may want to go up to 180cm. You can cut yours to whatever size you like, but keep in mind the cushions need to fit nicely onto this piece so you'll need to cut the cushions to your pieces correct size.
8
After cutting the timber to the desires size, I attached the leg plates with my screw driver. Measuring the distance between each to ensure they all sat in the correct spots. I then screwed on the legs, after drilling a pilot hole to match the leg thread.
9
Once the legs were attached I placed the cushions onto it. Then I attached the bolster at the head - I used some stitched pieces of leather from the original chair design for this so it gave a nice and clean look.
Voila!
I’m so in love with the way this turned out! The leather looks amazing and it’s created such a cozy corner in my studio. I have some leather leftover so I think I might make a matching armchair, what do you think?
Check out my other #FoundThenFlippedProjects below!
This project is in collaboration with Bunnings.
