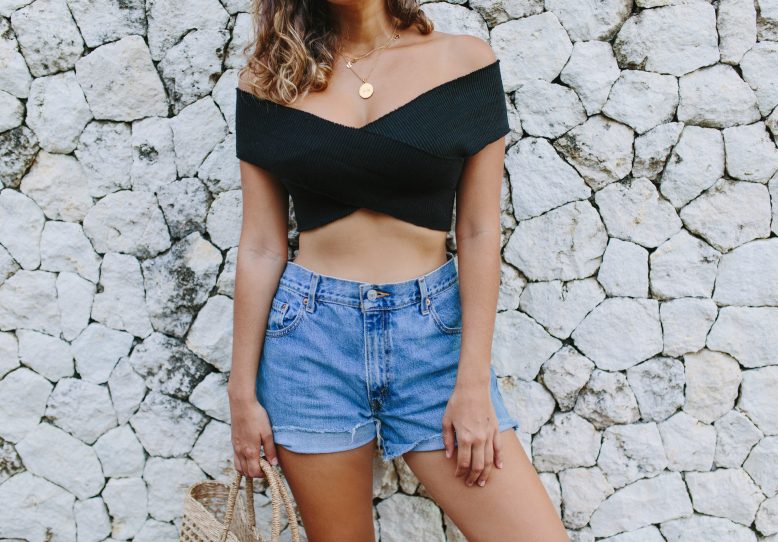
Hey guys! Looking for an easy wardrobe update for the summer or your next poolside hang out? Look no further than this DIY Ribbed / Bandage Crop Top.
In the next few weeks I’ll be sharing a few new DIY creations, many of which will be stepping up the skill involved as we experiment with summer trends (you may have already seen some on me at fashion week in Sydney!). Think ruffles, shirring, pleats… It’s going to be fun! But in the meantime, I wanted to share a project with you that is on the opposite end of the skills spectrum… as in, stupidly easy. Crop tops have proven to be a hit in the past (remember this one!?) so I thought why not try out a new one with you. Enjoy!
DIY Ribbed Bandage Crop Top
Video
You need
The main thing about this project is finding the right fabric. It might not be familiar straight away but look harder and it’s often used, folded over, as cuffs or waistbands on bomber jackets. I found mine at Spotlight in Australia, and it’s available in most big craft stores in the sewing and haberdashery section. It’s also available online on Ebay and Amazon (see here and here) and is usually referred to as ‘knitted waistband or cuff fabric/trim’. Make sure you buy large, long lengths and not ones made into cuffs already(!).
These pieces I have were 15cm (6 inches) wide and about 1m (40 in) long, joined into a loop with some stretch, but you can go wider if you have a bigger bust. Alternatively you could sew two pieces together lengthwise for even more coverage. In the end you’re looking for two stretchy loops of fabric that sit snugly on your body, so if you have to sew a long piece into a tube that’s fine too.
How to
1
Take one of the tubes, and put over your body. We've used a mannequin to show you how to do it but it works better to do it on yourself.
2
Place the other one over the other side of you, so that it covers your bust in a cross shape.
3
Arrange and pin the two tubes so they completely cover your bust. The place where you need to be careful is under the arms, make sure they cover your bra line if you plan on wearing a strapless bra.
4
Finally, using your needle and thread sew the two loops together at the back and the front where they overlap. Sew along the edge using an invisible stitch (longer at the back and shorter at the front) to secure in place.
To wear the top, I wore a strapless bra underneath and paired it with my (beloved) DIY denim shorts to go to the beach and hang around by our pool in Bali. For a more elegant look, pair it with some high waisted palazzo trousers so there’s less skin showing, or a high waisted pleated skirt. I’ll be sharing with you another idea for how to wear it in a few days. And by the way, make sure to only lightly hand wash the top!
Looking for more 5 minute DIY projects? Check out this DIY Convertible Body Suit, these was DIY Rope Heels and this minimalist DIY split back shirt.
Photos and video by Nicola Lemmon.


