Introducing DIY Weekly! I have to admit that when I do DIY projects, I always forget to take a before shot and write down exactly what it is that I did, which is no use to you! To remedy this I’ve decided to aim to upload one DIY tutorial per week. Hopefully this will focus my DIYing, help me remember to take photos of the process, and make sure that you guys get to see inside my DIY obsessed world!
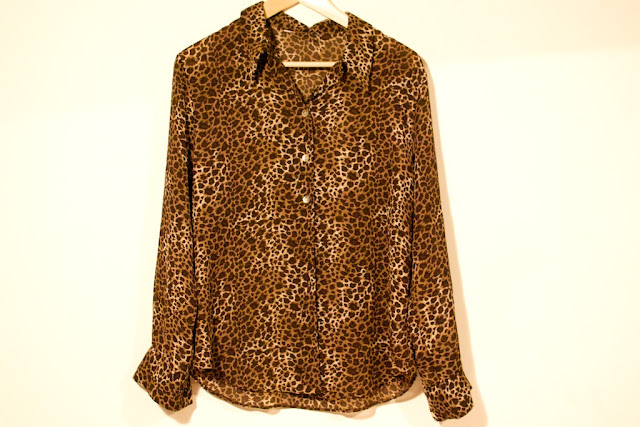
Here’s this weeks DIY. I bought a cute leopard print sheer silk shirt from a charity shop during my mid-week lunchtime thrifting (£1.50) and decided that it was time I got some shoulderless shirt action.
Here’s how I did it (please don’t hate me for lack of photos of the different steps…DIY Weekly needs some fine-tuning…):
1. I put on the shirt, and in the mirror using some chalk (I sometimes use light coloured eyeliner if I’m out of chalk) sketched roughly where I wanted the shoulderless section of the shirt to sit. I chose to go for quite a deep cut out, almost down to the elbows – but you can always angle it less for a more subtle cut out.
2. I then took the shirt off, lay it flat on a table and cut the marked section of the shoulders out of one side. I then tried the shirt on and checked that the angle was correct. It turned out I had to cut a little bit more out of it to perfect the angle.
3. I then folded the shirt in half down the middle lengthways so the arms were lying flat against each other, I used the chalk to sketch onto the other shoulder the exact cut out I had done. Its good to do this so that you get a symmetrical look. I then cut out the second side and tried it on in the mirror so I knew the cut outs were the same.
4. Then, using some brown thread, I hand sewed the edges of the cut outs. I folded the edge over a tiny bit so any fraying would be underneath and covered. If you have a sewing or selvage machine you can use that instead. I used a long stitch on the underside and a very fine stitch on the outside.
Before:
After:


