


Macramé, at first glance it can seem quite daunting, but we promise you it’s not!
In the last few years we’ve featured a lot of macramé designs on this blog, and each time we’ve had to explain various knots in detail. After seeing how much you guys love macrame, we thought it would make sense to share with you a complete knot guide, as a go-to place for the most useful and basic knots. You’ll be surprised just how often these simple knots are used in most projects! We’ve got plans to share lots of other projects with you in the future, so if you can master these simple knots you’ll be on your way to becoming a macramé queen (or king!).

Macaramé Knotting Guide

Reverse Larkshead Knot
This knot is most often used for attaching a piece of rope to a base rod or handle.
- Fold your rope or string in half, then, using the mid-point of the rope, create the loop around your rod or handle and thread the tail ends into the loop before tightening it.
- Be mindful that the knot will look different depending on which direction you thread the loop through.


Half Knot
This is one of the basic macrame knots. You can create variations using the half knot by mixing up the directions or the order.
- Using two middle cords as the base, tie the outer two pieces of rope around the middle cords and tighten. You’ll notice that the knots will begin to naturally spiral downwards as you continue knotting.
- To make the macrame piece spiral in the other direction, simply reverse the order of tying the half knot (e.g.If you put the right cord in front whilst knotting, the piece will spiral towards the left in a clockwise direction. If you put the right cord in front, it’ll spiral towards the right in an anti-clockwise direction). You can see in the photos that we demonstrate how the right cord goes in front of the knot, so the cord spirals down clockwise.
One thing to be aware of is that the outer cords will shorten after knotting, whilst the length of the center cords will remain unchanged.S o you may have to leave an extra allowance for the outer cords.


Square Knot
The square knot is a variation using the half-knot method. Which is basically half knots tied in an alternating order. So easy!
- If you begin tying the knot with the right cord in front (left photo), tie the next knot with the left cord in front (right photo).
- Reverse the order and repeat the knots again. You will find that the knots will develop in a flat weave instead of the spiralling half-knot weave.
Again, only the outer cords will shorten after tying, so leave extra shortening allowance to the outer cords.


You can also leave space between the square knots to create a spaced-out piece!

Net Weave Using Square Knots
The square knot can also be used to create a net weave for bags or larger pieces.
- Knot one row of square knots.
- Then leave some space in between and begin knotting the next row using alternating pieces of rope.
- Repeat the same steps until you achieve the ideal size for your netting.


Diagonal Half-Hitch
The diagonal half-hitch knot results in a tight flat weave, which is suitable for creating straps or large tightly-woven pieces.
- To create a weave that slants downwards to the left, begin knotting from the right using the second cord from the right, loop it around the first cord and tighten it. Then use the third cord from the right and loop it around the second cord, continue using the same order until you reach the last cord, then you can begin working on the next row.
- If you’d like a weave that slants towards the right, simply reverse the order and begin knotting from the left instead.
- Feel free to play around with the patterns, you can mix in alternating directions into one single strap.


Voila! We hope you enjoyed this crash course in macrame knots guys. We’ve got a really gorgeous macrame post coming for you very shortly.


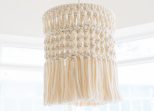
Below are some of our DIY macrame projects that can be made using these simple knots. Enjoy guys!


DIY Macrame Rope Bag, DIY Macrame Wall Hanging , DIY Macrame Tote Bag
Pin this handy macrame knotting guide on Pinterest!


