


It’s time to throw away all your plastic wrap in the kitchen.
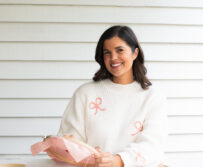
I’m all about saving fabric packaging bags and keeping them to use later on, there are so many things you can do with them! Which is why I was so excited when Sheridan asked me to come on board and get creative with some of the bags I have from shopping with them.

Materials you’ll need to make beeswax wraps:
- Fabric (I used some old linen bedding bags from Sheridan)
- 5g Pine Resin (I used this one)
- 17g Beeswax Pellets (I used these)
- 1/2 tbsp Jojoba Oil
- Spoon
- Oven
- Scissors
- Paint Brush (Just a little warning, it will get very waxy)
- Oven Safe Pan
- Parchment Paper

How To Make Beeswax Wrap:
1
I began by preheating the oven to 150 degrees C and cutting out the desired shapes and sizes of my fabric pieces.


3
To create the wax mixture, I added the beeswax, rosin and jojoba oil into a glass bowl and set that bowl onto the mouth of a pot which was filled with about 5cm of water. I then placed the pot and bowl onto the stove on medium to high heat, stirring the wax mixture until all three ingredients were fully melted.

4
I then placed the parchment paper over the oven safe pan and laid my fabric piece flat on top.

5
Once the wax mixture was fully melted I used my paintbrush to evenly brush a fairly thick layer of the wax onto my piece of fabric.

6
Once I finished applying the wax layer, I popped the baking tray into the preheated oven and let it sit for about 4 minutes or until the fabric looked wet.

7
I then removed the baking tray from the oven and carefully peeled off the fabric which I then hung to dry. The drying process should only take a few minutes!

How To Use Beeswax Wrap:
I love using beeswax wrap as an alternative to plastic wrap and I’ve always loved how fresh it keeps my food. They’re excellent to use for wrapping up cut up fruits and veggies, sandwiches, and to cover plates and bowls. They’re also really easy to clean. All I do is wipe them down with a damp cloth and use a touch of mild natural dish detergent and cool water to wash them off, then I simply pat them down with a dry kitchen cloth and let them sit to air dry. It’s important to avoid using warm or hot water as it will melt the wax.
This project is in collaboration with Sheridan.


