


")
Restoring a kerbside find into a shelf lamp, sometimes it’s the simple transformations that bring the most joy.
I found these shelves recently on the side of the road and even though the varnish was orange and scratched, I saw potential in the wood and the mid century inspired shape. Once it had been sanded back with a new coat of stain and varnish, I realised I could make them even better and turn that top shelf into a light.
")
")
Materials:
- Monarch brushes and scraper
- Electric sander
- Feast Watson Prooftint Stain in Oak
- Feast Watson Varnish
- Thin timber moulding
- Measuring tape
- Bosch Nanoblade
- Dropcloth
- Staple Gun
- Small nails and hammer
- IKEA Fado Table Lamp
")
How to Create a Lamp Shelf

2
Then it was time to sand back the shelves to reveal the beautiful timber with so much potential below! I found I needed to use two different sanders to be able to easily cover the large surfaces of the shelves and the small sections in between them as well.

3
I then wiped the shelves down to remove any sawdust and stained the timber using Feast Watson's prooftint stain.

4
Once the stain was dry it was time to seal the wood with a varnish. I have found with simple wood projects like this that the finish is really important, so take your time and make sure it is perfect!

")
I actually decided to try styling it at this point after the varnish had dried. I could’ve chosen to leave it as is, but I knew I had to go one step further and create a lamp on that top shelf. I’ve seen a lot of lovely inspiration around with lights encased in wood, and I realised this could be similar.
5
I decided to make some fabric covered frames to insert between the shelves. The first step was to measure the space where I needed the frames to fit. The measurements needed to be perfect so that the frame snuggly fits into the gap. Too small and it won't stay and too big and it won't fit. Once I determined the size of the frames I needed, I measured the lengths on a piece of thin timber moulding.


7
Now came the fun part - assembling the frames. I used a vice to hold one of the pieces of timber in place while I nailed it together. I repeated this to make the 3 frames that I needed!

8
Then I cut a piece of drop cloth to size and attached to the frame using a staple gun.


10
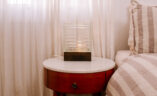
The final step was to add a simple lamp through the back and carefully staple an extra piece of cloth over the back to allow easy access to the lamp inside.

Voila
Here it is all finished! It’s the perfect spot for our record player and I love how it lights up the room.
")
")
")
Interested in more Upcycling tutorials and inspiration? Check out other projects here!
This post is in collaboration with Monarch Painting.


