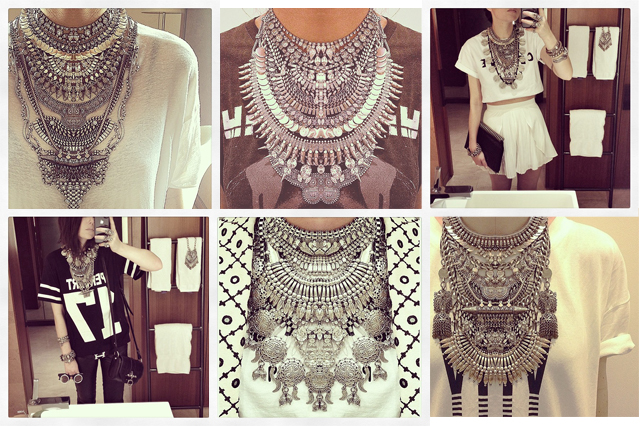
Many of you will think a stacked neck is merely about putting loads of jewelry on and leaving the house, but that’s only about a tenth of it – Drew (aka Dylanlex) has taken it to another level (read:artform) and I couldn’t be happier to share her secrets with you today. In the last year or so Drew and her sister have built a loyal following, inspiring stacked necks and perfect minimalist/logo tee/sport luxe outfits all over the world. Drew and I recently got chatting about our love of craftiness and neck jewels in particular, and it wasn’t long before we were feverishly planning her cameo here on A Pair & A Spare. Read on for a pro’s guide to the stacked neck.
You’ll Need:
- 5 or 6 necklaces that you are willing to break up, hit your local flea market to find bulk deals
- Pliers
- Scissors
- Jump Rings
- Stringing Wire (Metal or Rope)
- Extra Chain (in case length alteration is needed)
How to:
1. Pick the base necklace. The base necklace needs to hold the weight of the rest of the pieces, so make sure it is sturdy, the clasp is strong, and it has loops or holes where knots can be tied.
2. Take the second piece and center it on the base necklace. You will have to cut the excess on either sides of the necklace and attach Jump Rings. Cut 4” of stringing wire and tie the second piece to the base. The jump rings will help keep the conjoining parts secure, yet flexible so they don’t snap while wearing.
3. Select the third necklace and do the same as the second – center it. Cut the excess on either side if there is any and attach jump rings.
4. Attach on the other side with jump rings.
5. Work your way down the necklace, using jewelry wire to secure and making sure to use various types of necklace to create interesting textures.
6. Some necklaces you will have to cut to size and others, like chokers and other short necklaces, won’t need to be cut. Keep the leftovers for your next project!
7. Finally, attach large and eye catching pieces necklace to the bottom of the necklace to finish it off.
Voilà – a unique statement dylanlexneck is made!
To stay up to date with what Drew is wearing/making follow her on instagram @dylanlex, you can also tag your own stacked neck with #dylanlexneck to share your own creation with her!


