


It’s that time of year again! Time to get crafty.
If you’ve been following me for a while, you’ll know that for me there’s nothing more rewarding than being able to get creative and personalise the festive season in the form of decorations, gifts and entertaining ideas. For me, it’s all about helping me slow down, appreciate the little things and add some thought to the things that I give people.
And I have to say it’s a very special Christmas this year, our first as a family with little Frankie. And even though being only 6 months she might not quite ‘get’ the concept of Christmas yet, that hasn’t stopped me from crafting something beautiful for her as a gift. I racked my brain for something adventurous that she’ll be able to use for years to come, and zeroed in on the idea of this DIY indoor play tent. After a bit of planning it turned out to be such an easy project, and an incredibly rewarding gift to make!
This year I’ve teamed up with Asia Miles, who are all about enriching your life, to create three gorgeous DIY tutorials, all aimed at having a more rewarding Christmas season. Today I’ll be sharing this DIY Kids indoor play tent, later this week a DIY Christmas tree idea and finally a fantastic (+ simple and waste free) entertaining idea.

Looking online there are lots of tutorials for play tents, but not a lot of them were that structurally sound, many without bases or supports on the bottom. Ben and I chatted about this project and he suggested an easy way to create a base into which you could slip your poles so the whole thing had more structure. It turned out to be a great, and easy to do, idea!

1
First, you’re going to make the base for the tent. Lay out your canvas on the ground and place the timber on top in a square. Make sure that you lay the edges of the timber on that one point is touching rather than them overlapping.

2
Next, use your glue gun to first glue the timber down, and then fold the canvas over the wood.

3
Once all the wood is wrapped you will see that there are four small pockets in the corners, these will be where you slip your poles.

4
Once you are ready to set up your tent, place your poles on top and put them into the pockets. Twist them around so they are overlapping at the top.

5
Take your rope and very tightly tie the poles together. If you don’t plan on moving the tent I would use hot glue to secure them together then wrap with rope.

")
7
Secure the fabric at the top of the teepee. You can sew this by hand but I found a dab of hot glue did the trick.

8
Finally, tuck the drop cloth in underneath the base for a clean edge. And you’re done!

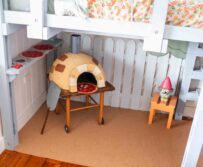
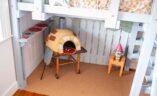
Voila!

Obviously Frankie is getting her gift a little early this year, it’ll be the Christmas that keeps on giving!


By the way, can you guess how many DIY projects are in this little set up? I’d love to hear if you have any other fun projects that you’ll be doing this year! Stay tuned over on Instagram for two other very rewarding DIY ideas, for a #LifeRewarded Christmas.
This post is in collaboration with Asia Miles.


