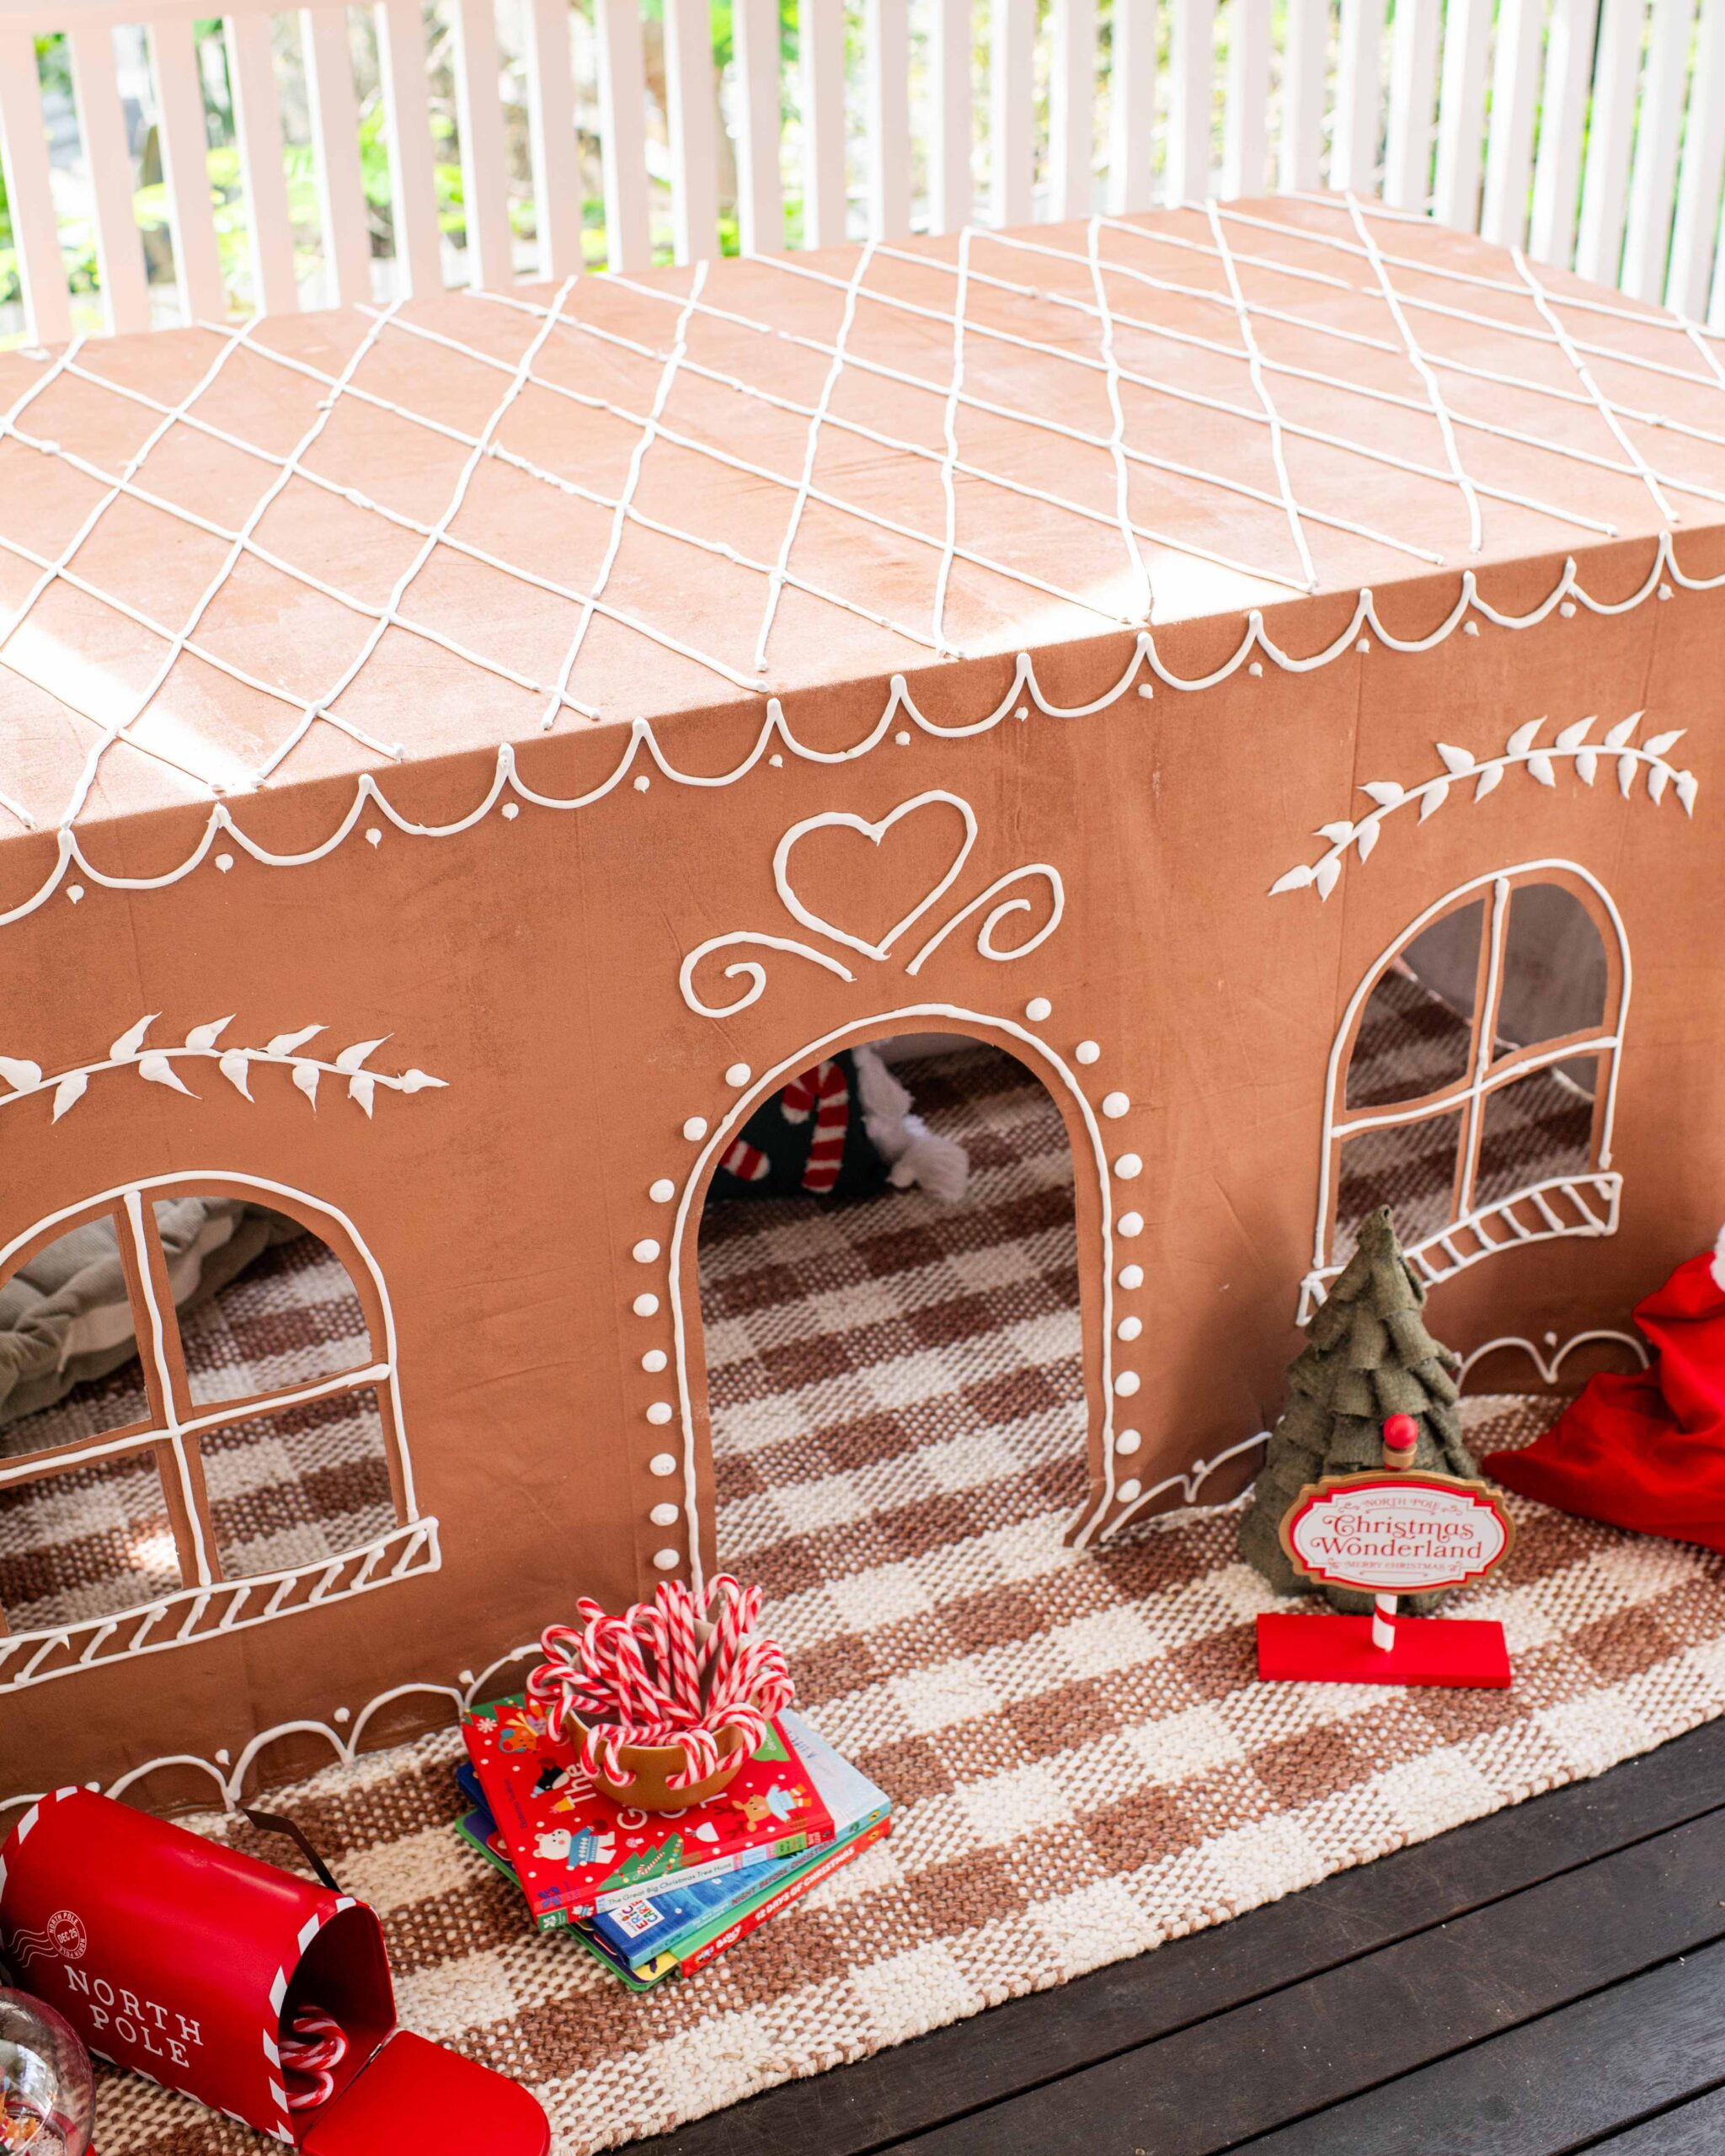
Just when I thought I couldn’t love the original table cloth cubby any more, enter the gingerbread house cubby!
With the Christmas season here, I just HAD to make a festive version of the kids beloved tablecloth cubby and a gingerbread house seemed like the cutest idea. I knew I’d be able to keep the basics of the cubby the same, using a drop cloth as the base, cutting holes for windows and doors, but this time I wanted to change the colour of the whole drop cloth and add ‘icing’ just like a normal gingerbread house. Figuring out how to do the icing was one of the funnest parts, experimenting with different materials and ideas. I could have simply painted white paint on but I really wanted the 3D texture like real icing so I had to be a little more creative. Read on to see more.
When experimenting with how to do the piping details I needed to first decide on the actual material to use, and after testing paint, plaster, glue and a mix of all those together I finally had an epiphany; Gap filler! Gap filler is white, flexible, the right consistency – everything I was looking for. And most importantly it sticks well and won’t crumble off after drying. At first I tried piping the gap filler on using a caulking gun but it was quite difficult to get control over the smaller details so I thought why not try an actual piping bag. And wow did it work! I can’t believe how well it all came together. I love it and the girls love it even more.
You need
- Drop cloth
- Brown paint
- Paint roller and tray
- Scissors
- Marker
- Piping bags and tips
- Gap filler
How to
1
After painting the drop cloth brown and letting it dry, I lay the cloth onto the table and marked with painters tape where the edges of the front would be, I had a boarder to work within. I then pulled that section up onto the top of the table so I could continue working on a flat surface.
2
I market out all the windows, doors and shapes including scollops around the edges. I found it much easier to pipe over exisiting lines. I then cut out the door and windows.
3
I then filled my piping bag with gap filler and began piping over all my drawn lines. First, around the windows and doors and then adding more details.
4
I found it worked best to start with the basics and keep adding more until it all looked balanced.
And there you have it. A really simple project with a seriously magical outcome! I couldn’t be happier with how it looks and the girls were so excited when they got home from kindy and saw the surprise.


