


By now I’m sure you know, I have a passion for old things – items that are worn and imperfect, especially wood. There’s just something so cosy and comforting about the patina of age! But sometimes it’s hard (or expensive) to find exactly what you want in secondhand or vintage stores, like perfectly imperfect looking rustic stools, so I’ve spent the week working out how to make one myself.
The main part of this project was working out how to distress the pine wood, to give it a worn in and lived feel. I have to say, the last week has been equal parts hilarious and educational, as I tried all the weird and tacky ways the internet suggested I ‘age’ or distress wood. Including but not limited to: whipping with a chain, running over with the car, putting in the washing marine (I did not do this, don’t do this). I’m going to do a separate post going through all these in detail, what worked, what didn’t and what was just plan ridiculous. For this post, I’m going to simply take you through exactly what I did for this specific stool.


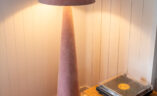
Inspiration


Time to make : 3 hours | Cost to make: approx $60
Materials You’ll Need
- Furniture Legs x 3
- Angle Leg Brackets x 3
- Feast Watson Prooftint in Old Baltic
- Feast Watson Timber Floor Wax or Timber Wax Spray
- Timber round or thick piece of timber to cut a 30cm in diameter sized circle out of.
- Drill
- Hammer
- Screws
- Sander
*note that for this project you only need to use a small amount of the stain and wax, so you will be able to use these items for other projects.

Distressing The Wood
As I mentioned, I tried a LOT of methods for distressing the pine wood, and I’ll do a little separate post about all of those. One that I found worked well was whacking the wood with a heavy chain to give it nice dents. But overall, I opted for a more mainstream approach using the following method.
Step 1: Sanding. The first thing I did was sand the legs and top to give them a more handmade shape. For the top, I tried to sand all the edges so they were soft, and then also sanded the shape to make it feel more irregular. For the legs, I sanded them a lot around the top to give a tapered look, and then did racer areas of sanding to create flat planes along the length of the leg. I thought this gave the feeling of being handmade.
Step 2: Hammering A lot of the random internet methods I saw were about giving the piece believable looking dents, and in the end I found a hammer worked just as well to do this.
Step 3: Using A wire brush I used a wire brush attachment on the drill, and I simply used it along the grain of the wood to open toe grain.
Step 4: Using Screws Finally, I wanted to create ‘notches’ or genuine looking holes in the wood, so I hammered in a screw into the wood and then pulled it out, pushing it towards one side to help crack away extra pieces of wood.
-
Sanding to give a tapered look. - Sanding to give a tapered look.

-
Hammering for dents. - Hammering for dents.

-
A wire brush to open up the grain. - A wire brush to open up the grain.

-
Screws to create notches. - Screws to create notches.

I was quite happy with how these methods worked. I think the end result looked really lovely with a hand when feel.


Making The Stool
Once the wood was distressed, I moved on to making the stool! This was very easy and didn’t take very long at all.
1
The first thing I did was decide where to place the angle brackets on the underside of the stool top. I used a triangle of paper, marked the centre and then marked the centre of the circle, matching the two up to locate the angle brackets.

2
I installed the brackets by screwing them in and then using a large pilot hole bit to drill space for the screws for the legs to go into the wood.

3
The nest step was the screw the legs into the brackets. I found these to be quite tight and need a bit of muscle but I knew that was important for the stability of the stool.

4
I then did some testers of the stain options for the stool, in the end I chose to do two coats of Old Baltic.

5
The most important step in this whole process was to stain the stool! Literally as soon as the stain started going on I knew it would look so great! I actually used one of the Feast Watson Floor Applicators for this, on my hand instead of on a show which you would usually do. I simply dipped the applicator in the stain, and then applied it. I used one half for the wet stain and the other half of the applicator to buff the stain in. I did two coats and then finished with the Timber Floor Wax.


One question a lot of people asked is whether this stool can be sat on, or is it more decorative. I’ve sat on it without any problems!


I’m not going to lie, when I first started this project I purposefully chose a simple design because I figured it would be easy! Well, looks can be deceiving and it took a bit of trial and error (and a few bumps and bruises) but I was finally able to nail the design. I can’t wait to experiment with this more!
This project is in collaboration with Feast Watson


