


")
Hellooooo Ikea hack! You didn’t think I would do a whole renovation without one or two did you?
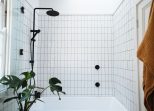
Thanks for your lovely feedback on our bathroom reveals from yesterday. I was so excited to share these spaces with you! You will have noticed that we integrated two fun DIYs into the bathrooms and I’ll be sharing them this week. First up, the pendant lights!
With the clean and minimalist design of the bathrooms, I really wanted to use lights that would soften the space and give it a more earthy feel. And I knew baskets were definitely going to have to be part of this bathroom somewhere… So hello basket lights! The best thing about this? These Ikea baskets only cost a few dollars so are definitely something anyone could do! Read on for how to make them yourself.

Before we start
I just want to say that you need to take particular care with any electrical and lighting related project. Make sure you use a qualified electrical to put in the hanging light, or use one that exists already. There are also plug in options that are a great idea (this one from UO suits a US voltage but you’ll be able to find something like this to suit your region) . Then, be careful when removing the light bulb and refer to an electrician if you are unsure about this. And always make sure your power is switched off when you do it – I like to switch it off at the main power box just to be sure!
Choosing Your Pendants
A word on choosing the right pendant light bulbs for this project. Essentially you’ll be sliding the baskets up onto the pendants above the bulb, and you don’t want the basket to slip down onto the bulb. We used this pendant, and slid the basket over the top of the rim so that they fit well and won’t slip down. Look for a rim like that on the one linked when you are looking for your pendants.

How to
1
The first thing to do is to remove the handles on the bags. You can do this by simply cutting them off.

2
The next thing you need to do is cut a hole in the bottom of the baskets where the light will come down. The baskets have a circular pattern on the bottom and you can use that as a guide. You will need to check the size of the upper rim of your pendant lights that we spoke about above, and make your hole smaller than that so that they sit properly and don't fall down onto the light bulbs.

3
The baskets actually have two layers so you'll need to cut through them all the way.

4
The final step is to install them onto the hanging light globes. All you need to do is unscrew the bulbs, place the lights on, and then screw the light bulbs back on. If you are at all unsure about this step, make sure to have a licensed contractor help you with this.

There are two options for how your lights can look. The first is with the baskets open, and the other is for them flipped up.
Which one do you prefer?


Thanks guys and enjoy!


