


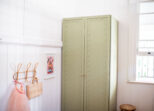
I am all about using the walls for storage, and so I couldn’t be happier with this fold-down wall rack. This project was simple, affordable and quick; all things I love when it comes to a DIY project.
You guys know that this year I wanted to challenge myself to get more creative with timber, and I’ve been loving working with Bosch to really test my skills! I recently made this Globe Light Side Table and so I’m back with another woodworking DIY with this wooden wall hanger.My goal with any DIY is for my project to always look more expensive and elevated than they really are and I feel like this does that. This is one of those projects where the right tool makes all the difference and makes a project so much easier and neater.
In case you’re wanting to start experimenting with tools a little more, you can get 15% off these tools using my code ‘GENEVASDIYTOOLS’ at the product links below.

Materials
- Timber
- Dowel
- Bosch Advanced Trim Router 18V-8
- Bosch Circular Saw
- Bosch Easy Impact 18V – 40
- Feast Watson Prooftint Stain in Old Baltic
- Satin Varnish
- Wood glue
- Screws
Get 15% off on tools using my code ‘GENEVASDIYTOOLS’ at the product links above.
How to Make the Wall Hanger
1
I started by using my Bosch Advanced Trim Router 18V-8 on one side of a long piece of wood to get the angled edge.

2
Then I used my Bosch Circular Saw (the Universal Circ 18V-53) to slice the wood into a mixture of 2 and 3cm pieces. I made sure to sand the pieces to remove any splinters.

3
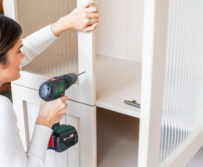
I then drilled a hole in every piece using my Bosch Easy Impact 18V - 40. I made sure that the size of the hole I drilled, matched the dowel for the inside.

4
Then is was time to stain and then varnish all of the pieces. I found it easiest to pop all of the pieces into a ziplock bag with the stain and shake the bag, then lay them out on a table to dry. Once they were dried, I threaded them onto the dowel, alternating the 2cm and 3cm pieces.

5
I then glued and screwed the larger pieces onto a piece of moudling, leaving the 2cm pieces free. Then it was time to screw the whole thing to the wall.

Voila

This project is in collaboration with Bosch.


