


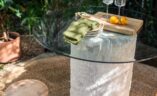
Ok so if there were medals for one’s ability to upcycle and make do, my mother would surely win.
She’s one of those practical people who finds a way to reuse everything, and her commitment to shopping secondhand is notable. Sometimes too much? I mean, she recently found a scrunchie on the beach and was like ‘Geneva I thought you would like this, it’s perfectly good’. I’m not sure about you, but I had to draw the line at secondhand scrunchies! Anyway, for pretty much everything else I’m very into it and we love going secondhand shopping together. Although, I have to admit that mum’s not quite as committed to aesthetics as I am, I guess that’s something I get from my dad! Anyway, she found this trike (three wheel kids bike) in a thrift store for $3 and thought it would be a hit with the kids (my brother has a girl Frankie’s age). And she was right. They went mental for it! But honestly, it hurt my eyes and definitely needed an update. Read on for what I did.
Before & After
This is the before and after of the project, and I have to say I love it a lot. OF COURSE I used some terracotta paint (you remember this?) but balanced that bright colour with a blush chalk paint and some rope details. Trash to terracotta!
")
")
Materials
I bought everything I needed from Bunnings for this project, and also chatted to them about the best paint to use. I know that it can be hard to find a paint that will adhere to this poly plastic and not just come off, but luckily there was a great option that included a primer so the paint could stick properly and create a base for the chalk paint.
")
- 1 can of Rust-Oleum Ultra Cover in Satin Blossom White
- 1 can of Rust-Oleum Chalked in Blush Pink
- Mega Treat Liquid Terracotta
- Rope
- Foam brush
- A paint brush
- E6000 glue
- Old plastic or dropsheet
I chose to use the chalk paint because it is matte, which is something I also choose over a satin or glossy finish. Just a personal preference!
How to
1
Lay out a drop sheet or some recycled plastic to work on. Make sure you are in a well ventilated area or preferably outside. I then gave the bike a really good clean with some sugar soap and water. Then I used old bags to cover the wheels.
")
2
The first step is to spray the whole body of the bike. To do this I used the white undercoat which is designed to stick well to this type of plastic. Once that was dry, I did two coats of the pink spray paint. The chalk paint sticks to the undercoat so it's a good idea to make sure you use that. I let that dry overnight.
")
3
This is what the bike looked like after the body was painted. It's a very subtle pink which I was really happy about because I didn't want it to be too over the top. Ben said it reminded him of marshmallows.
")
4
I then got to work on the details! I used my favourite terracotta paint for a few details on the bike. I was actually initially going to use leather but realised paint would work better and last longer.
")
5
I also used the terracotta colour on the seat too. I used a foam brush for the main part of the seat and then used a smaller brush to do more precise details.
")
6
I wanted to add something to the bike to make it feel more textured, and realised some rope detail would be perfect. I wrapped the start of the handles with two rows of rope. To do this, I did a line of E6000 glue and then wrapped the rope around it, then tied the rope in a really tight knot underneath. I like that this hides the join of the terracotta paint!
")
7
To do the seat, I did an outline of glue and then wrapped the glue around the edge of the seat. I did a the join on the underside of the seat.
")
")
")
")
")


